Thinking of tie-dyeing? Simple instructions for beginners

Superheroes At A Birthday Party
July 20, 2020
Tips to convert your kid’s artwork into gifts!
July 30, 2020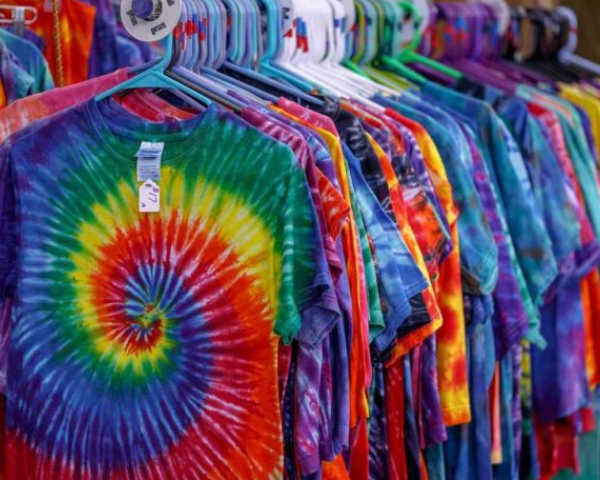
Tie-dye technique – What is it and how it is done?
If you are learning to tie-dye for the first time, you have arrived on the right blog. Tie-dye is a sign of a happy, hippie era and free expression. The tie-dye technique makes a comeback very often. So, it never misses its representative free-spirited, uniqueness through tie dye’s exclusive designs.
At the start, you may find it a little messy and challenging to learn tie-dye. But as you learn, you would find it pleasing and fun where your entire family would enjoy. There is no wrong or right in the end result. If you have all the materials, the process is not complicated at all. If you are thinking of starting a tie-dye task as part of DIY crafts, you should read and follow these instructions.
What are the things required to tie-dye?
- Tools like metal tongs and scissors
- Marbles
- Gloves
- Bands
- Stirrers
- Water
- Buckets
- Fabric
- Dye
- Workspace
Simple tie dye patterns to try out
Nebula design: If you are thinking about crafting ideas for kids, it is suggested to try this lovely tie-dye pattern. Nebula or cosmic design is simple to do. To do this, you have to first take a shirt and wet it thoroughly. Then, lay it flat. Wrinkle and scrunch the fabric using your fingers. It should be gathered into a stiff disk. Take some rubber bands and wrap around the disk. When you bind it tight, the final output will be better. After tying, swirl the fabric in a bucket of the color of your choice. Use the tongs to pick the fabric. Surely, you will find an interesting cosmic design that impresses all.
Bull’s eye pattern: It almost looks like a bulls-eye or target. It is simple to make this pattern and one of the best crafts for kids. You have to lay the shirt flat. Pinch the middle part of the shirt and tie rubber bands at both layers. It should be about one to two inches from the middle. Apply rubber bands about a one-inch distance from each other. The final results would look impressive.
Diagonal stripe design: Do you want to try a unique or new tie-dye shirt pattern? Well, you have to think about doing these multiple colored diagonal stripes. First, flatly lay for the t-shirt. Next, fold the short in an accordion fashion that is from the bottom end. After folding, tie using rubber bands at a distance of one to two inches.
Polka Dot pattern: Polka design is easy and fun to do. Collect some dried beans or plastic beads. Cut the plastic sheet into small squares or just the size of beads in squares. Place the bean inside the shirt and plastic wrap above the shirt. Wrap tightly using a rubber band. Repeat to make several dots in the shirt. Before dyeing wet the t-shirt.
Tie-dye upcycle tips you can consider
Some of the interesting items you can upcycle through tie-dye are as follows:
- Oven gloves and aprons
- Beach wraps and caftans
- Fabric tote bags, bags
- Hair scrunchies and headbands
- Scarves
- T-shirts, white ones work great
- Anything you think or requires a bit of fancy zing and zest.
How to stop tie-dye from fading?
When you tie-dye articles, you need to remember to wash them on your own. If in case you are throwing in the washing machine, there are chances of dye transfer. Do not wash it with other clothes. It should be washed separately. When it mixes with clothes of other colors, dye transfer and destroy your other clothing.
Know More About : Fun DIY Olympic Crafts For Kids